Settings & appearance
Some things live outside the fight: which libraries you play with, how much your players see on the screen you share with them, which keys run which commands, and whether the app is light or dark. They’re set once and remembered in your browser, with no account needed. Click the gear at the top right and choose Settings. The same menu holds the light and dark switch, the keyboard cheat sheet, a link to this handbook, and Report a bug, which opens a new issue on GitHub.
Settings opens on five tabs (Libraries, Tracker, Player view, Keyboard, and Importer) and starts on Libraries.
Libraries
Section titled “Libraries”OpenFray ships with more than one edition of the rules, and with extra books of creatures. On the Libraries tab, tick the ones your table uses. The list is grouped into Core, OpenFray, and Other:
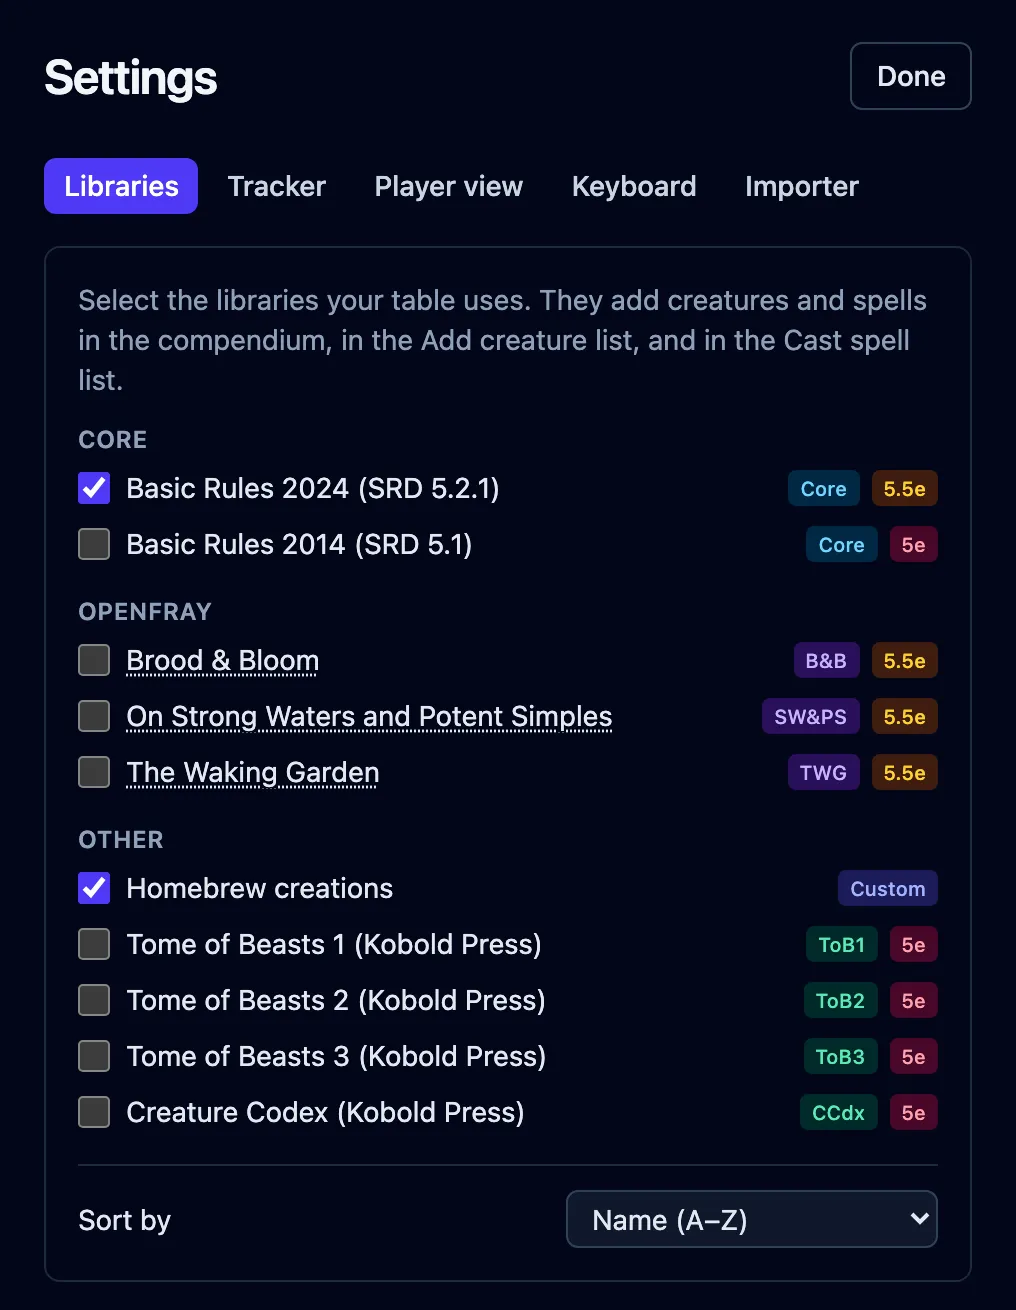
- Basic Rules 2024 (SRD 5.2.1) — the newer rules. On by default.
- Basic Rules 2014 (SRD 5.1) — the older rules. Turn this on if that’s what your table plays.
- Brood & Bloom, The Waking Garden, and On Strong Waters and Potent Simples are OpenFray’s own books. Their names are links: click one to read the book itself, in a new tab.
- Homebrew creations — your own creatures and spells, on by default. Turn it off to shelve them all at once.
- Tome of Beasts 1, 2, and 3 and Creature Codex are four bestiaries from Kobold Press.
What each book contains is covered in The compendium, along with where the rules come from. A Sort by dropdown under the list orders it by name or by group.
Whatever you turn on shows up in the compendium, in the Add creature list, and in the Cast spell list, each entry badged with where it came from. The choice is remembered in your browser, so it sticks whether or not you’re signed in.
Tracker
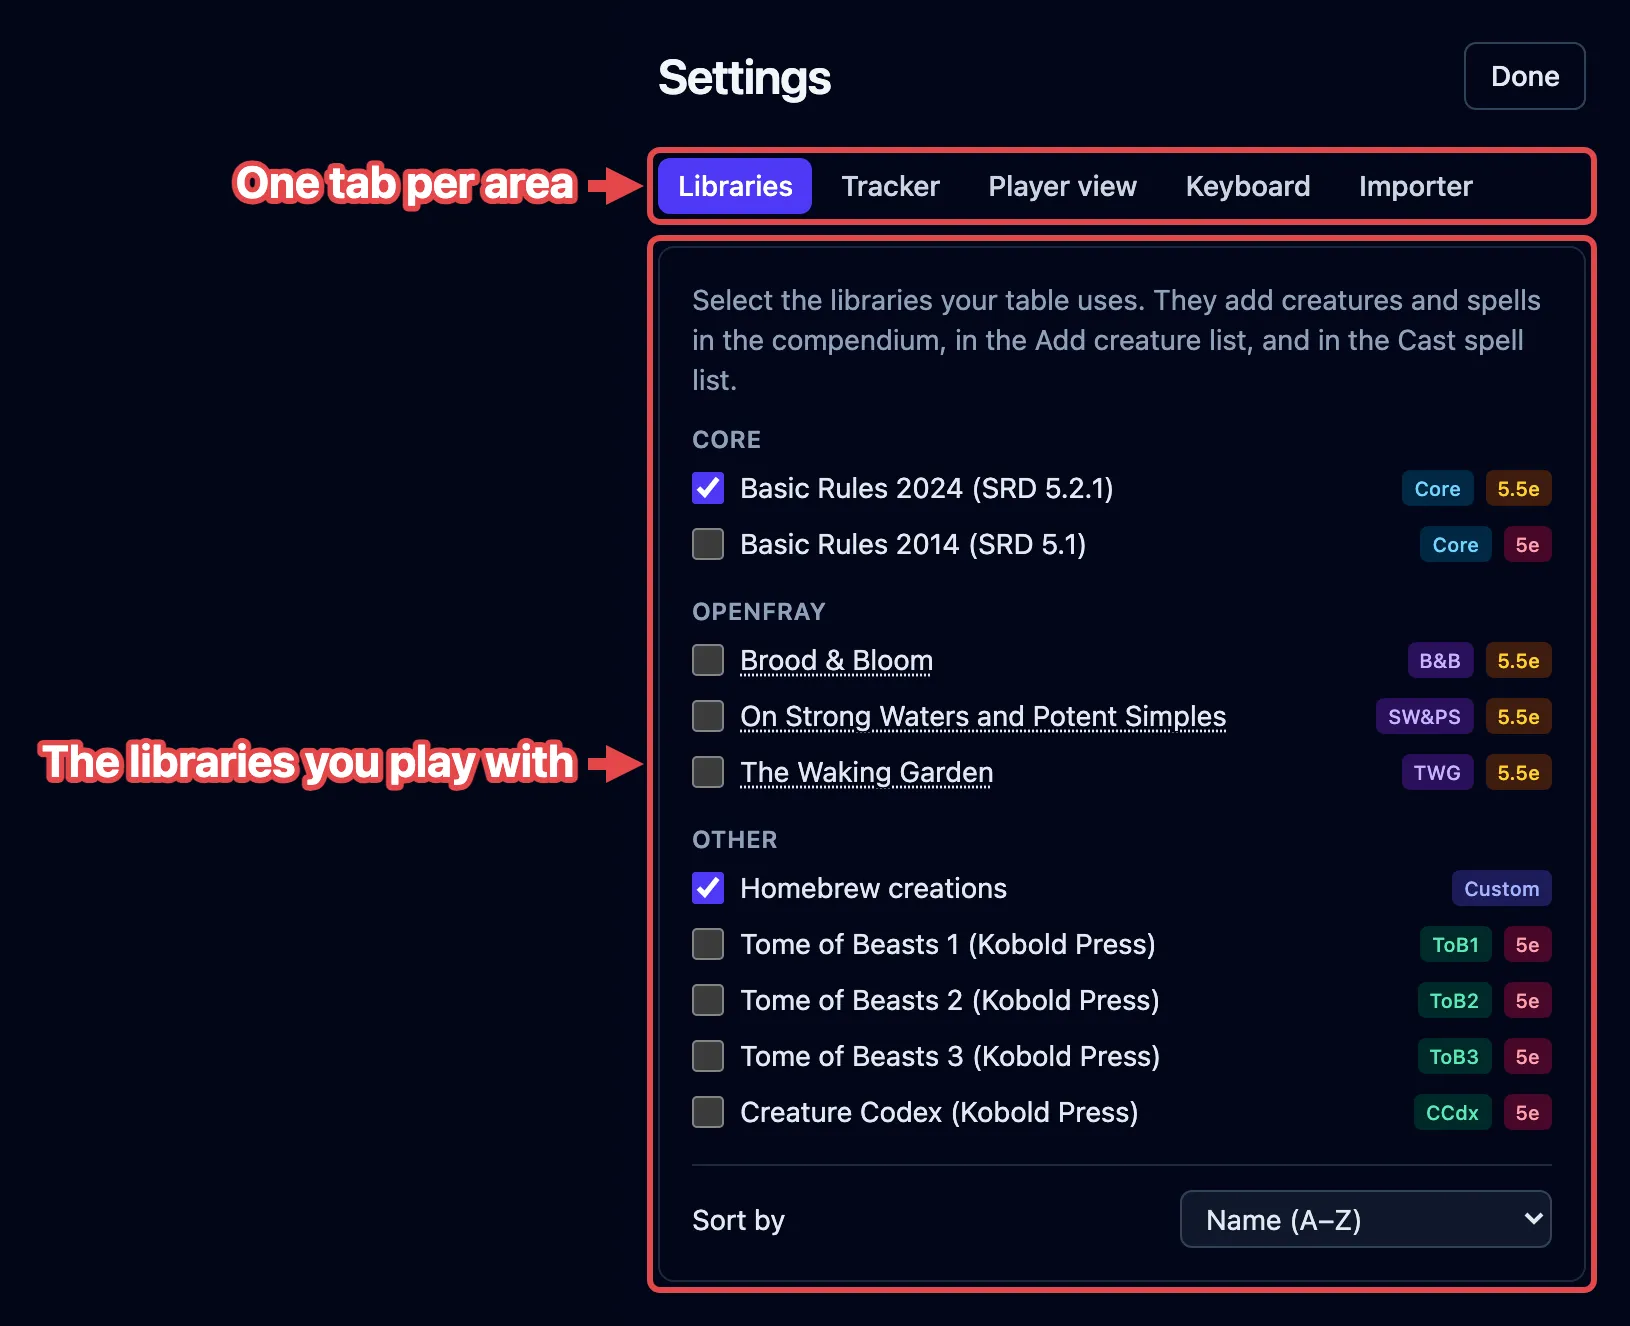
Section titled “Tracker”Open the Tracker tab and choose Creature labels to set how repeated creatures are labeled:
| Style | Examples |
|---|---|
| Numeric (default) | Goblin 1, Goblin 2, Goblin 3 |
| Roman numerals | Goblin I, Goblin II, Goblin III |
| Letters | Goblin A, Goblin B, Goblin C |
A single creature keeps its name. Adding a second matching creature labels both. Removing creatures leaves the remaining labels unchanged. Changing the style affects new labels; existing labels and names you type stay as they are. Letters continue after Z as AA, AB, and so on.
To change the side markers in the tracker, use the color pickers below Creature labels:
- Click Creature color to choose a color for creatures opposing the party.
- Click Ally color to choose a color for player characters and allied creatures.
- Click Done to return to the tracker.
Colors apply immediately and stay in this browser. The shared player view follows these colors unless you set separate colors on the Player view tab. Hit-point colors and active-turn and selection highlights stay unchanged.
Click the counterclockwise arrow beside a color box to reset that color. The buttons are named Reset creature color and Reset ally color. They restore the theme’s red creature markers and light blue ally markers independently.
Choose colors you can distinguish against your light or dark background.
Player view
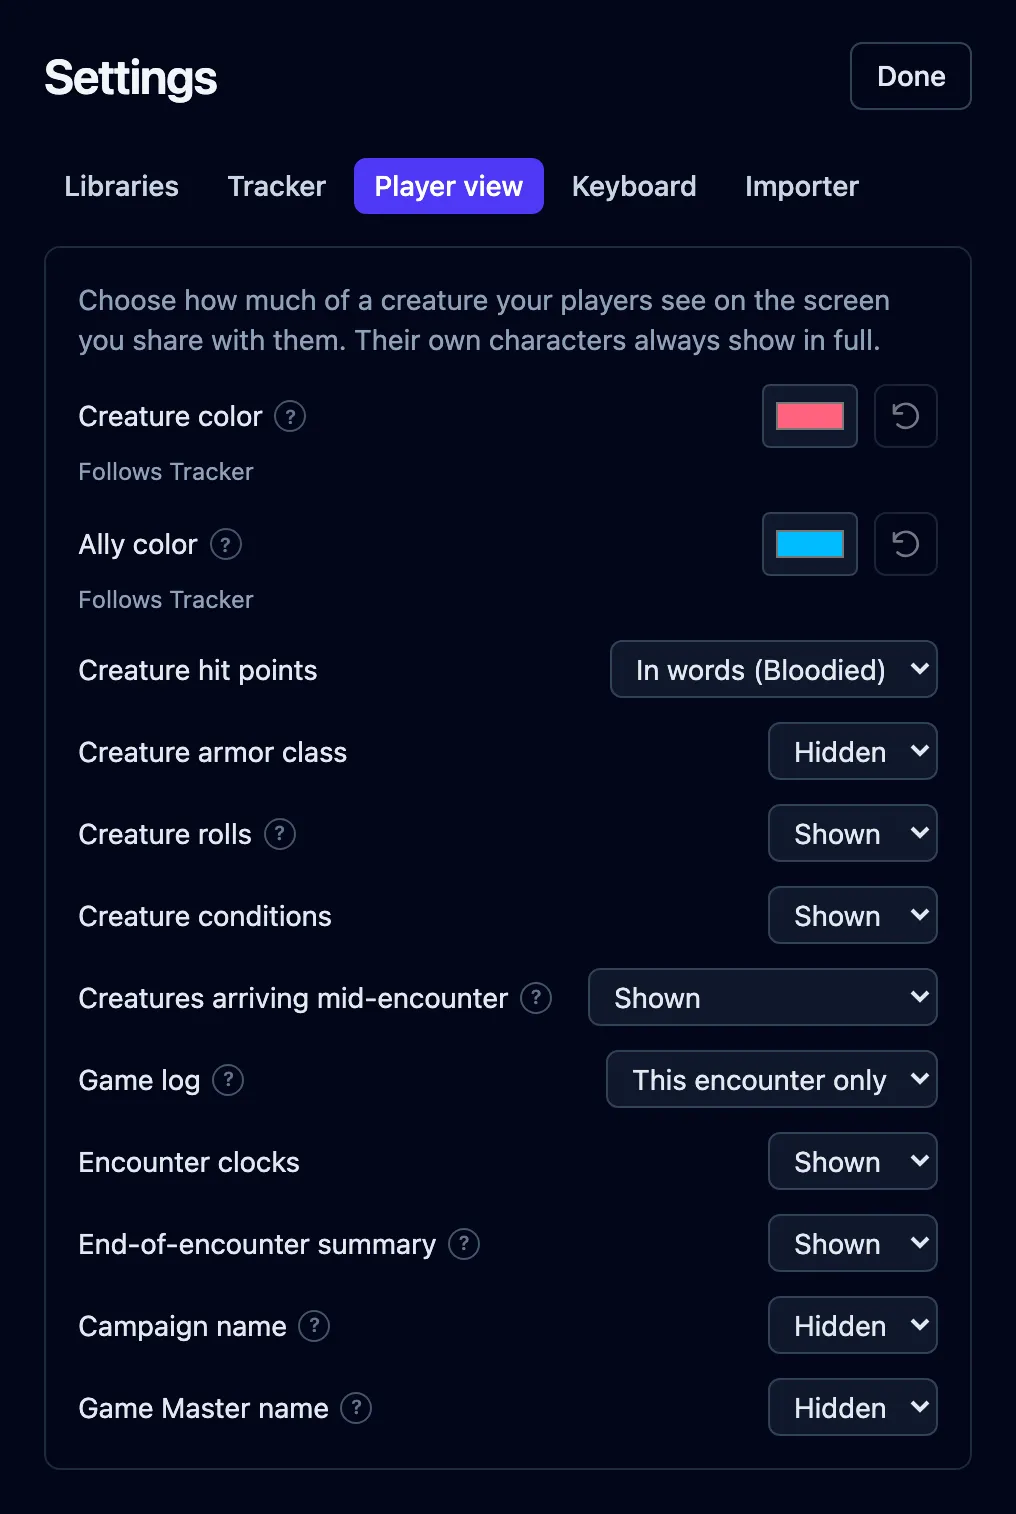
Section titled “Player view”The player view is a read-only screen your players follow on their own devices. You choose its marker colors for everyone watching:
- Open the Player view tab in Settings.
- Choose Creature color or Ally color to override that tracker color on the shared screen.
- Click the counterclockwise reset arrow beside an override to make it follow Tracker again.
Follows Tracker means changes on the Tracker tab also change that player-view color. Custom player-view color stays as you set it, even when you change Tracker. Each color follows or overrides independently. These choices leave your own tracker unchanged and are remembered in your browser.
The other settings decide how much of a fight reaches your players:
| Setting | What you can choose | Starts as |
|---|---|---|
| Creature hit points | In words (Bloodied) · Exact number · Hidden | In words |
| Creature armor class | Hidden · Shown | Hidden |
| Creature rolls | Shown · Hidden | Shown |
| Creature conditions | Shown · Hidden | Shown |
| Creatures arriving mid-encounter | Shown · Hidden until revealed | Shown |
| Game log | This encounter only · The whole session | This encounter only |
| Encounter clocks | Shown · Hidden | Shown |
| End-of-encounter summary | Shown · Hidden | Shown |
| Campaign name | Shown · Hidden | Hidden |
| Game Master name | Shown · Hidden | Hidden |
Player characters always show in full, whatever you pick here, and so does anyone fighting alongside them. Every choice reaches your players’ screens straight away, mid-fight included. Any single creature can also be hidden or revealed on its own, from its controls beside the stat block.
The last two put a line at the top of your players’ screen: the campaign’s name, and Run by your profile name. Both start off, and the Game Master’s name needs an account, because an anonymous link has no name to send.
A ? beside a setting’s label explains what it does. Point at it, or tap it on a touchscreen. Anything written in plain sight beside a control instead is telling you something about its state.
Sharing itself is the cast button in the top bar. See Share the player view, which explains each choice.
Keyboard
Section titled “Keyboard”Nearly every command in the console has a key, and the Keyboard tab is where you change which one. It lists all 26 commands in the same five groups the cheat sheet uses, each with the key it currently answers to. For the full list of what the keys do, see Keyboard shortcuts.
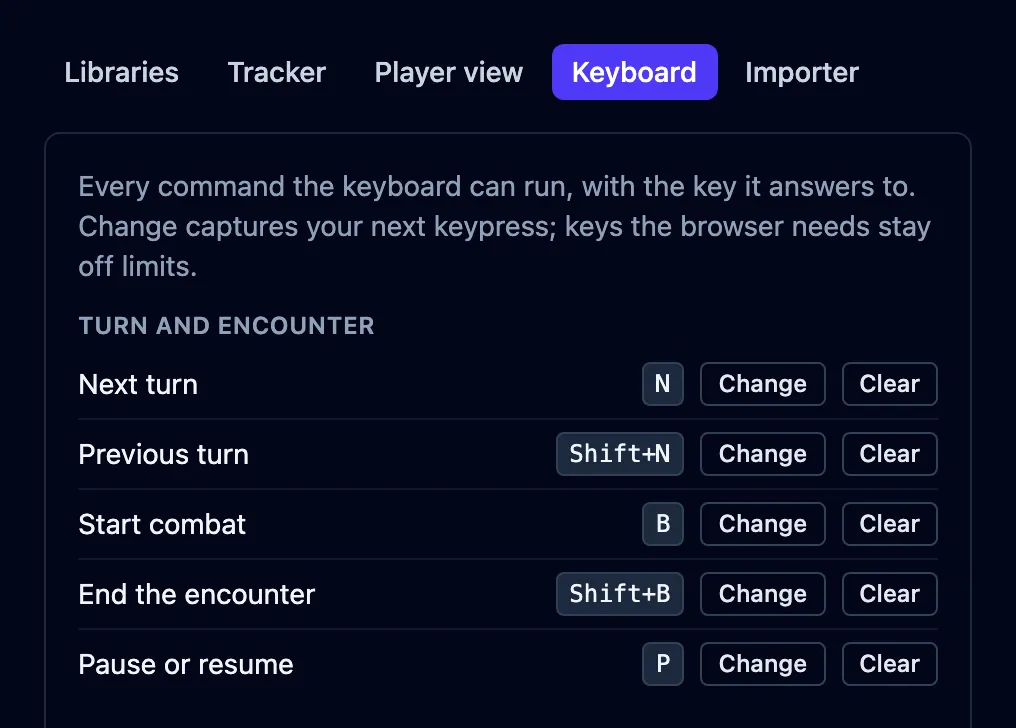
To give a command a different key:
- Click Change on its row. The button reads Press a key… while it waits.
- Press the key you want. Hold Shift or Ctrl with it for a longer chord.
- Check the row. The new key shows beside the command straight away.
A key that’s already taken is refused, and a line under the row names the command
holding it. Keys the browser needs for itself are refused the same way. Press Escape
to back out without changing anything.
Clear takes a command’s key away, leaving it Not set. The command still works from its button. Restore defaults, at the bottom of the tab, puts every key back at once and asks you to confirm first.
Light or dark
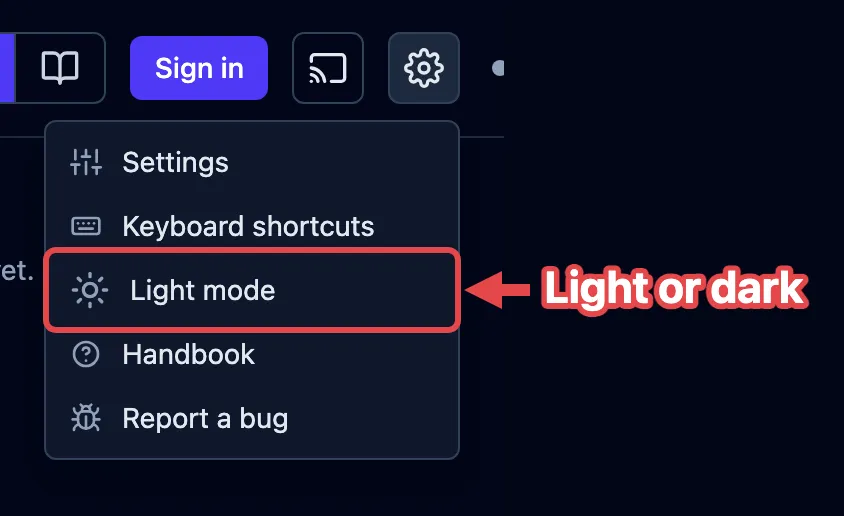
Section titled “Light or dark”Click the gear at the top right, then Light mode or Dark mode. The row names the one you’d switch to. OpenFray opens dark by default. Your choice is remembered in your browser, and it’s shared with the OpenFray website, so both match.
The importer
Section titled “The importer”The Importer tab links to the OpenFray Importer, a free browser add-on that turns a D&D Beyond creature page into an OpenFray creature. There’s a button for each browser it’s published for: Get it for Chrome and Get it for Firefox. See Import from D&D Beyond.